


Boho Lace Tablecloth Teepee Sewing Tutorial
Hey y'all! I am super excited to share this new DIY project with you.


The full list of supplies with links to the exact stuff I use in my studio:
- 5 yards of 48" unbleached muslin
- 1 lace tablecloth at least 50"x56" but any larger size will work
- 2 doilies at least 12" in and up to 20" in diameter
- Lace trim or Ribbon. 2 pieces: 1 yard each.
- Pinking Shears - Super important to have some for this project if you don't have a serger!
- Fabric Scissors
- Thread
- Measuring Tape
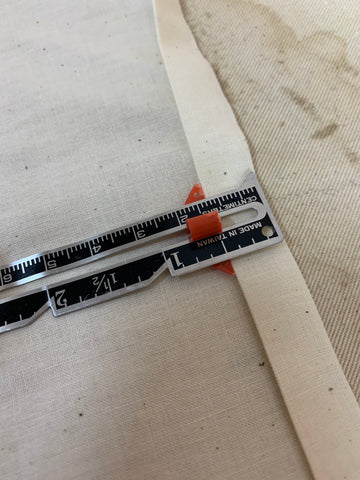
- Sewing Gauge
- Pins
- Sewing Machine
The first step is to cut all your fabric. This tent is made of 4 main parts: the 3 muslin triangles (I call them the sides) and the lace front "door" panel.
Unroll your muslin and mark it 56.5" from the bottom up. Mark both selvedges and then use a teepee pole to draw a straight line across. Cut.
Next, find your middle point and mark 2" on each side of it for 4 total inches at the top. Draw a line from each of these marks down to the bottom corner of the fabric. Cut using the pinking shears. This will ensure the fabric doesn't fray. Repeat 2 more times to make 3 matching triangle sides.

I did mine upside down, so you're seeing it upside down here.

This is a photo of the 3 side pieces once they are all cut out.
Now you need to cut your lace front. Start by laying it out flat and measure from the bottom corner 56" up, mark it. Then 3" to the right of that mark again. Draw a straight line between these two places. At the bottom corner, mark 25" to the right and make another mark. Draw a straight line between this and the top right point and cut. You'll have the right door.


Now take this and put it over your other corner, right sides together. Use it as a pattern piece to cut the other side.


To make the front "door" panel lay these two pieces beside other with right sides up. Layer the left over the right and fold back 1/2" and then 1" and pin. You can turn it over to make these folds if it's easier (see photo below) Then sew this all the way across using a zig zag stitch


This is the back side

Picture of the front after it's been sewn.
Next, use your sewing gauge to make a fold that is 3/8" and then 1/2" on the top and bottom of each triangle side panel. Press with your iron.
Sew using a 3/8" seam allowance to hem on top and bottom of each side panel.
Excuse my stained ironing board cover!!!

Now it's time to assemble the doily windows! You'll need to take 2 of the 3 side panels and lay them out flat, right side up. Place the doilies in the center and pin them. Use lots of pins here!
Sew them on using a zig zag stitch. Once they are sewn in place, use your pinking shears to cut the muslin off of the back side. This creates the see through peekaboo windows!


front view

Back view
Repeat on the other panel:


Back Side

Front Side
Time to sew this thing together! You start with one plain side panel and a doily side panel. Pin them, right sides together and sew. Then pin the other doily panel onto the plain panel and sew. Make sure you back stitch at the top and bottom to reinforce the seams.


First Seam / shows 2 pieces sewn together.

When you're done with this step, this is what you have. 3 side panels sewn together with the plain one in the middle.
Before it's time to sew the lace front on, you need to get your lace trim out.

Pin one side of the lace front door panel onto one of your teepee sides. Next, measure halfway down (about 30") and place the lace tie between the layers. Sew the two layers together, backstitching at the top and bottom.

When you're done with this, your lace trim should be sewn between the 2 layers. This makes the tie back for the front doors.

Repeat on the other side.
You're almost finished now!
But before you are ready to set up your tent, you must press the seams. I use this iron, and I am OBSESSED with it. It was a Christmas gift from my mother in law (who is also a sewer) and she knows all the best sewing stuff! When you hold the handle, the metal plate lowers to touch the fabric. When you let go, it raises. This way, you never have to worry about burns. You can also walk away from it without having to set it upright. The cord is super long, the steam function works perfectly. All the settings are spot on. Seriously, if you are looking for a new iron, this is the one. I don't know how I lived without it! It's called the Oliso Pro.


It even comes in pink now!

Ok, almost done now. Do you remember cutting out the circles where the doilies were? I use these to make 4 matching ribbons. You could also use any fabric scraps or ribbon. You need 4 pieces about 12" in length.

Pin them onto each of your seams on the inside of the teepee about 12" from the bottom. These function as ties to hold the teepee on the frame when it's set up.

Now it's ready for its poles! This particular pattern needs 4 wooden sticks that are 6 feet long. You can buy them at your hardware store, or buy a set from me.
I sell them in my shop here. Mine are designed and cut by my husband and we drill holes near the tops for the rope to tie through. This ensures that your frame will be sturdy and not slip around during its use.

I hope you are able to make something beautiful for someone special in your life. Please tag me on insta and facebook using #poetrytea